Container and layers
The major difference between a container and an image is the top writable layer. All writes to the container that adds new or modifies existing data are stored in this writable layer. When the container is deleted, the writable layer is also deleted. The underlying image remains unchanged. Because each container has its own writable container layer, and all changes are stored in this container layer, multiple containers can share access to the same underlying image and yet have their own data state. The diagram below shows multiple containers sharing the same Ubuntu 15.04 image.
Docker uses storage drivers to manage the contents of the image layers and the writable container layer. Each storage driver handles the implementation differently, but all drivers use stackable image layers and the copy-on-write (CoW) strategy. Another way to see the layers that make up an image is to inspect theimage with the docker inspect command. The example below inspects the same ubuntu: latest image.


When you no longer need an image, you can delete it form your Docker host with the docker rmi command. rmi is short for remove image. Delete the node image pulled in the previous step with the docker rmi command. The example below addresses the image by its ID
$ docker rmi f3068bc71556
Containers
The container is the runtime instance of an image like we start a VM from a vagrant box. We can start multiple containers from one single image. We create a container from an image by giving docker run command. Containers run until the processes running inside them exists. There should be a minimum one process running inside the container with PID 1. If this process dies the containers also dies.

In above container /bin/bash has the PID 1, this process will get killed if we hit exit command
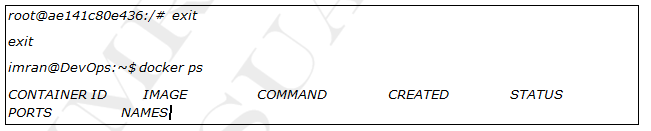
As exit will log out and kill the current shell and that’s our PID 1 our container also got killed with it.
docker ps -a will show all the containers running or exited.


We started the above container in the background by option -d we also have given a name to our container by --name option Above image is an Apache web server which is running on port 80 but can be accessed by the forwarded port from the host. Host Port 8070 is mapped to containers port 80. That means if we access host machines IP on port 8070 we will get service running on port 80 from the containers. Containers are not directly accessed by their IP’s because container Ip’s are not permanent. We will discuss that in detail in the networking section. We access service running in the container from host port which is redirected to containers port this is called a port forwarding.
-p 8070:80 means host port 8070 is mapped to containers port 80. Verify the container web service by accessing it from a browser on http://hostip:8070

Check nginx, apache and Jenkins registries from docker hub and run them to understand more about it.
$ docker run -p 8080:8080 -p 50000:50000 -v /your/home:/var/jenkins_home Jenkins
Here we are mapping two ports 8080 and 50000, host and container ports are same which is ok if your host ports are not busy. Containers data is not persistent that means if we delete the container its data is also lost, which is obvious. But if we want to keep that data safe on the host machine, we can use -v flag which is for volumes. The left-hand side is host machine directory path and the right-hand side is containers directory path which you want to save on host machine. It’s similar to our vagrant sync directories.
Now even if we delete the container its data in /var/jenkins_home will be safe on the host machine in /your/home directory.
Inspecting Containers
In the previous example, you might have noticed that we didn’t specify a command for the container when we issued the docker run. Yet the container ran a simple web service. How did this happen? When building a Docker image, it’s possible to embed a default command or process you want containers using the image to run. If we run a docker inspect command against the image we used to run our container, we’ll be able to see the command/process that the container will run when it starts.

Comments
Post a Comment